Showing posts with label chalk paint. Show all posts

Thursday, February 13, 2014

Sweet Seats: Three Shabby Chairs Get Glammed, Part 1


When one at a time our families came over, we began noticing we didn't have enough chairs. Then, on New Years Eve, when everyone came together, it was painfully obvious.

Time for a chair chase! Little did I know how much work I was in for...

I went to a great thrift store nearby that exists to offer jobs to special needs adults. They always have the most amazing stuff, and the staff is wonderful.

The last one of a set, this chair was reduced to $14.99, so I snapped it up. It was loose and rickety...but a few nails should remedy that, right? WRONG.
You can't nail a chair together. It has to be glued.
So, I stopped there. You see, the beauty of chalk paint is no prep. This was going to be a lot of prep. Not what I bargained for...well, maybe. But, I plead inexperience!

Then like, a week later, I thought. OK. Let's do this.

I took it completely apart, sanded the joints to remove old paint and glue. (NOTE: label each of the joints by number with masking tape before taking it apart or you will be sorry!)


I discovered that what I had thought was some hybrid of baby food and 70s olive-mustard was really just a worn out gold. Too bad, so sad. 


Then I painted the frame with the same homemade off-white chalk paint (aka plaster paint) as before. Distressed w/220 grit; finished with wax.


I had to reconstruct the upper right top because it had been damaged somewhere long ago. I used a vinyl spackle and sanded it down lightly after it dried, to match the other side. You can't even tell! Shocked, this one was.


I wanted to stain the seat, so I stripped it (YUCK what a MESS) and sanded it until it shone...and under all that was a beautiful maple with excellent grain flow and just tons of exquisite pink tones. Who would paint such a gorgeous chair!?

And then I stained it. LoL


A few coats of wipe-on poly, a few shots with the nail gun to attach the seat, and voila! Gorgeous, solid, sound, hardwood chair.
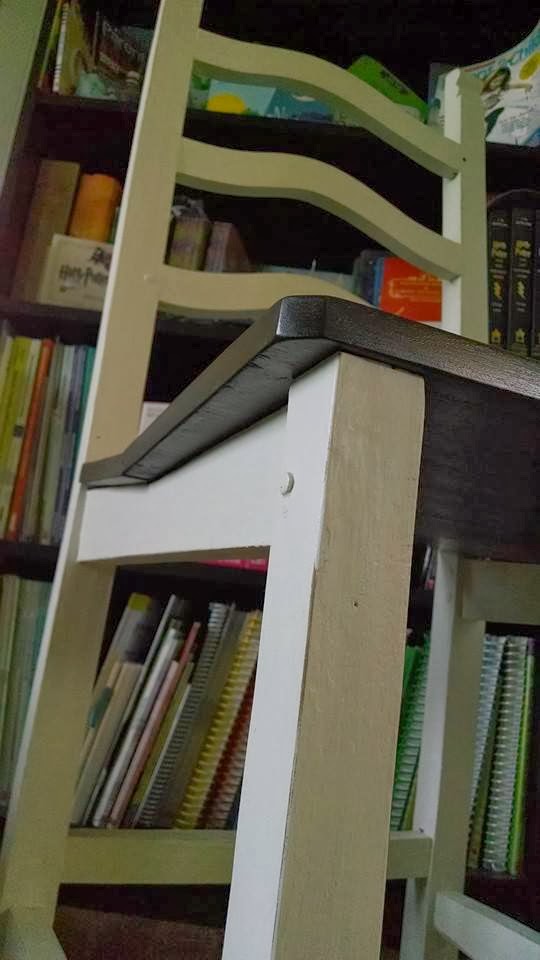


Things I learned from this project:
  1. Stripping is a monster. I used a spray-on stripper. Next time (if there is one...) trying Citrustrip, as recommended by 5 out of 6 furniture bloggers. ;)
  2. Only buy sound, solid furniture. Rickety, shaky stuff is only worth the discount if it's really really beautiful and really really cheap...which it so happens this turned out to be. *Phew!*
  3. Chairs are tough. They have tons of crevices, corners, angles, and surfaces. They take a long time. You will think of them as your children by the time it's done. Undertake only in times of necessity.
  4. Inspect all surfaces. What may look nice and smooth from 2-3 feet away may be hiding very rough edges you have to sand a lot. Not a deal-breaker, but definitely a note-to-self.

Friday, January 31, 2014

Wannabe to WoW: Not-Great-Blue Side Table Gets a French Gray Makeover

My family was coming to visit that day, and I badly needed a side table to replace the UPS box (*silent scream*) that was currently holding the lamp next to the guest bed...

So, in desperation, I stopped at a very very grungy little "flea market" I happened to be passing on the way home from the grocery store.

To my surprise, amid the acres of junky junk I saw the first time I was there, I discovered this newly marked-down diamond in the rough:


I confess, in my inexperience, I was impetuous. The $10 price tag sold me, no questions asked. I should have AT LEAST inspected for insects. And then, looked closer at the piece. If you do, you'll notice how sloppy the white lines are. And, between paint drips and rough chips and outright gouges in the wood, it was a bit of a disaster. Not to mention that what was prob supposed to be Wedgewood blue - was the right shade of NOT. 

I decided some leftover gray paint and would make it a perfect companion for the new twin bed in that room.

So I set in, sanding it out, despite the 5-degree cold front we were enduring (I get determined sometimes). It turned out to have a white AND black layer of paint underneath which proved problematic when I tried distressing. But...

...eventually worked in my favor.

With care and the right amount of plaster paint (aka homemade chalk paint), some wax, and a teeny-tiny paint brush (and lots of hours...) to (***finally***) get the lines right, the result was great.


*   *   *

In case you're curious, here's how it went, from start to finish:
  1. Find and buy cheap table. Be dumb. Don't inspect (who does that?).
  2. Remove and paint handle. 
  3. Sand...and sand...and sand (triangle power sander + 80 grit > 120 > 180; then hand sanding at 220)
  4. Mix up plaster paint [(1/2 cup plaster of Paris + 1/2 cup warm water) + 1-1/2 cup fave flat or satin paint]. Slap on initial 2 coats. 
  5. Carefully apply 3rd (and should be final coat)...
  6. Use tiny brush to paint in white lines with white plaster paint. Cover mistakes and straighten edges with tiny foam brush dipped in gray. 
  7. Hand-sand painted surfaces lightly (220) all over; rougher on the edges.
  8. Paint over underneath layers of paint I didn't expect to show through.
  9. Start waxing only to find massive imperfections that first sanding didn't rectify.
  10. Buff what's salvageable before the wax hardens.
  11. Sand again...
  12. Spot repaint.
  13. Wax all over. And buff.

How it should have gone:
  1. Find cheap table. Inspect to know what you're getting into. If you're OK with the work : price ratio, buy cheap table.
  2. Inspect for bugs (particularly bed bugs...) and give a generous wipe with mineral spirits to remove any doubt.
  3. Remove and paint handle. 
  4. Sand. Don't rush. Find ALL the spots.
  5. Mix up plaster paint. Slap on initial 1-2 coats. Carefully apply final coat. Allow to dry.
  6. Hand-sand painted surfaces lightly (220) all over; rougher on the edges to distress.
  7. Use tiny brush to paint details. Touch up edges of details or areas that you "over" distressed.
  8. Wax all over. And buff. Done!

Monday, January 27, 2014

Retro Twin Bed Turns Shabby Chic

Once there was a bed...and it was ancient (in the not so good way).


But it was $30 (rock on Habitat Restore!).

So the question is not whether to buy it, but rather...
...whaddyagonnadoabouwdit?


*    *    *
At first glance...
  • Pros: solid wood, interesting shape with lots of "distressable" features. 
  • Cons: circa 1978-1982 ooooggglllehhh faux wood grain textured in...arbitrarily, no less. (It's real wood crazy faux grain maker people...!)
  • Up-In-the-Airs: What to do with the "bear claws"?

*    *    *

Took a first run at chalk paint. Decided I liked the "bear claws" after all, but perhaps a little less dramatic-like.


A little vinyl spackle works wonders. 


Next, after the white paint...
  • tried some gray in the outer border crevice...
  • decided I didn't like it... 
  • attempted to wipe it with a wet paper towel... 
  • it only partially came off and... 
  • I LOVED IT!
So I did it super lightly on the interior crevice of the 4 panels to add a bit more depth there, too, and then repeated on the other piece. Yay! 


...right before the wax, right after distressing... 

(which is a super easy process: 220 sandpaper lightly all around, concentrate 
on corners and borders to chip the paint... #reasonsilovechalkpaint )


Finally...my favorite part (besides distressing)...the wax! You can't imagine how luxuriously smooth, rich, and satin the finish feels after the wax coat.


The wax also gives it a really rich, luxurious sheen...love love love... 

*confetti*


Add $10 metal rails I found on Craigslist, and you have a bed!

 &

Up next: see that not-quite-Wedgewood-blue-but-trying-to-be side table?
I'm thinking...a nice French croissant gray...


Friday, January 24, 2014

The Bookshelf: Refinishing Old Memories with Chalk Paint

My first attempt at using chalk paint. Good memories with this bookshelf that's almost as old as memory itself for my sisters and me...


From the way it sat in our childhood bedroom to its new form today using 
homemade chalk/plaster paint and Johnson's soft wax, I give you, The Bookshelf.


I used a plaster-of-Paris base with S.W. tester quart of an off-white I liked. 


After paint, before stain. I learned the hard way that I really should have done it the other way around:

~~ Chalk paint goes over anything. Stain does not. ~~

It would have saved me hours! Because, I also learned, blue tape doesn't work very well to keep prevent stain leakage - or any leakage, for that matter - unless you're willing to spend a very long time pressing down every millimeter of the edge. Which is not possible in dark, tight corners. I would have been better off to stain the shelves first, and paint over anything "outside the lines" with my miracle paint. Oh well. Lessons learned! 

*    *    *

For the shelves, I wanted to use stain from my own walnut trees, but it would have been water-based and raised the grain (which meant lots of waiting and sanding…), so I went with a Minwax oil-based instead. (I've since switched to a new gel stain though, and it was love at first rub.)


What I didn't know when I took this picture was that the stain had seeped under the blue tape...so, this is about 4 steps from the end instead of the 1 it should have been.

Also, you can't see that it fell over in a wind storm one day and the back got cracked, adding another 3 steps before the end. Thanks to my patient husband who benevolently looked on while my project dominated the back porch with nary a word of frustration or hurry.....(not!)

*   *   *
And...the final product! 

I distressed the edges using a 220 grit sandpaper. (P.S. LOVE the 220!)


I especially like how the chalk paint made kind of a ripple in the corner here (below) and I even left some of the stain seepage because it looked like aging.


Finally, over the painted areas I hand-rubbed on Johnson's paste wax 
(natural color; no stain added to darken).


 After the wax dried, I buffed it. The result is a super luxurious smooth, satiny finish.
Wipe-on poly did the same for the shelves.